Your Airbnb kitchen photos can make or break a booking decision. Guests spend considerable time researching properties online, and kitchen images often determine whether they click 'book now' or move on to the next listing. Effective Airbnb kitchen photos staging transforms an ordinary cooking space into an aspirational destination that showcases your property's potential for memorable stays.
Research shows that listings with well-staged kitchen photos receive 23% more bookings than those with basic room shots. The kitchen represents comfort, convenience, and the promise of home-cooked meals during a guest's stay. Whether you're targeting families planning self-catered holidays or business travellers seeking apartment-style accommodation, your kitchen photography directly impacts your listing's appeal and booking conversion rate.
What Makes Kitchen Photos Essential for Airbnb Bookings?
Kitchen photos rank among the top five most-viewed images in successful Airbnb listings. Guests use these images to assess cooking capabilities, storage space, and overall property quality before making booking decisions.
Unlike other rooms that serve primarily aesthetic purposes in listings, kitchens provide practical information that guests actively seek. Families with dietary requirements need to see adequate cooking facilities. Business travellers want evidence of coffee-making equipment and basic appliances. Holiday groups look for entertaining space and sufficient prep areas for group meals.
Professional listing analysis reveals that properties with comprehensive kitchen photography achieve 18% higher average daily rates compared to listings with minimal or poorly staged kitchen images. This correlation exists because detailed kitchen photos signal property quality and thoughtful host preparation, justifying premium pricing in guests' minds.
Kitchen photos also reduce post-booking complaints and negative reviews. When guests can accurately assess cooking facilities before arrival, they're less likely to feel disappointed or misled about property amenities. This transparency builds trust and contributes to higher guest satisfaction scores.
How Should You Stage Your Airbnb Kitchen Photos?
Successful kitchen staging creates an aspirational yet realistic environment that showcases functionality whilst maintaining visual appeal. The goal is demonstrating capability without cluttering the space with unnecessary items.
Start by completely clearing all personal items, cleaning supplies, and everyday clutter from visible surfaces. Wipe down all appliances, ensuring they're spotless and fingerprint-free. Pay particular attention to the cooker, sink, and any stainless steel surfaces that show water marks or smudges easily.
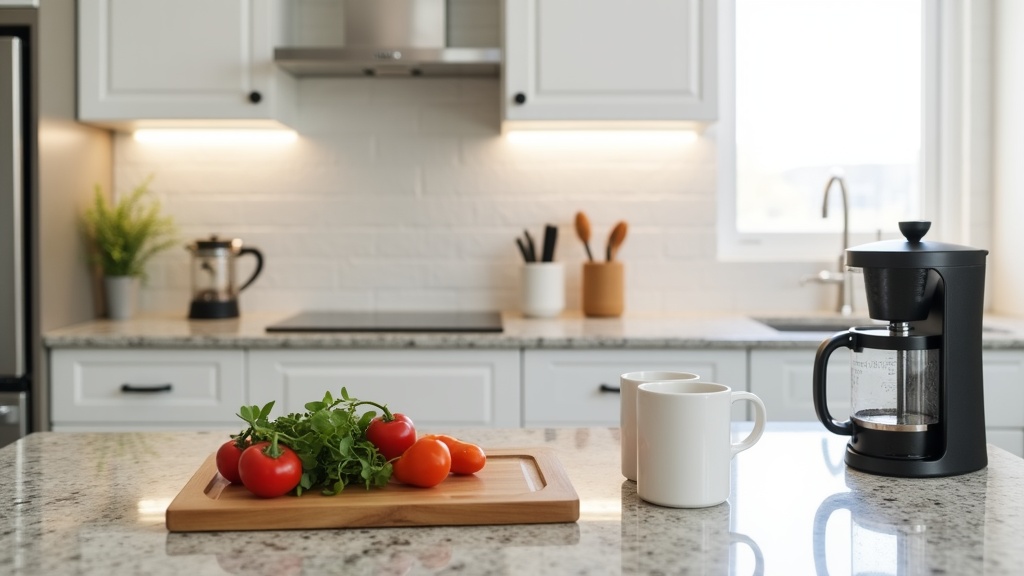
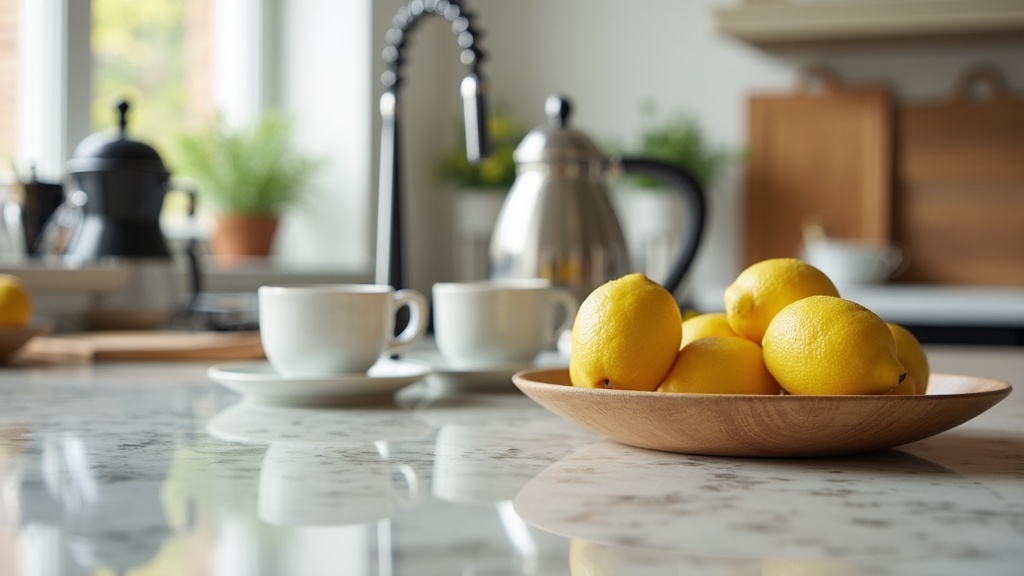
Add strategic styling elements that suggest use without overwhelming the space. A wooden cutting board with a few fresh vegetables, a cafetière beside clean mugs, or a bowl of lemons on the worktop creates warmth without appearing staged. Avoid overly elaborate fruit displays or obviously artificial arrangements that can appear dated in photos.
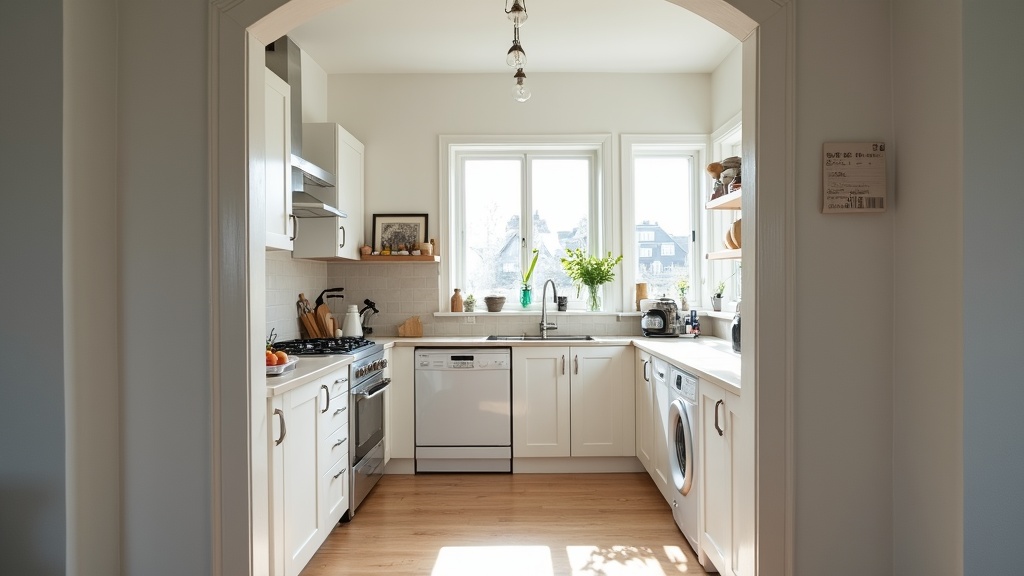
Ensure all appliances are positioned optimally and clearly visible. If you provide a dishwasher, microwave, or washing machine, make sure these amenities are obvious in your photos. Guests specifically search for properties with these features, and clear visibility in images helps your listing appear in filtered searches.
Open cupboards strategically to show storage space and quality crockery. Displaying a few pieces of attractive dishware or showing well-organised storage demonstrates that guests will have adequate space for their belongings and quality equipment for meal preparation.
Which Angles and Shots Capture Kitchen Appeal Best?
Strategic camera positioning transforms ordinary kitchens into compelling visual narratives that highlight functionality and flow. Wide-angle shots should showcase the entire kitchen layout, whilst detail photos demonstrate specific amenities and quality touches.
Begin with a comprehensive overview shot from the kitchen entrance or doorway. This establishes the room's size, layout, and relationship to adjacent spaces. Position yourself to capture maximum worktop space and ensure all major appliances are visible. Avoid shooting directly into windows, which creates harsh backlighting and obscures interior details.
Capture a second angle from the opposite corner to show alternative perspectives and any features missed in the primary shot. This might reveal additional storage, a breakfast bar, or dining area integration that adds value to the space.
Include detailed shots of key amenities that guests specifically seek. Photograph the cooker and hob clearly, showing all burners and oven capacity. If you provide a dishwasher, capture an image that makes this amenity obvious. Coffee-making facilities deserve their own detail shot, especially if you offer more than basic instant coffee provisions.
Consider lifestyle shots that suggest the kitchen's potential for guest enjoyment. A setup suggesting morning coffee preparation or evening meal cooking helps guests visualise themselves using the space. However, ensure these shots feel natural rather than overly contrived.
For more comprehensive guidance on achieving professional-quality results, our detailed guide on how to take Airbnb photos that book covers technical aspects and equipment recommendations that elevate your entire listing's visual appeal.
What Kitchen Styling Mistakes Should You Avoid?
Common kitchen photography errors significantly reduce booking appeal and can make even well-equipped spaces appear uninviting or cluttered. Recognising and avoiding these mistakes ensures your kitchen photos contribute positively to your listing's performance.
Overcrowding surfaces with decorative items ranks as the most frequent staging mistake. Whilst some styling adds warmth, excessive fruit bowls, candles, plants, or ornaments distract from the kitchen's functionality and make spaces appear smaller. Guests want to see available worktop space for their own meal preparation.
Poor lighting destroys kitchen appeal faster than any other factor. Shooting in dim conditions or relying solely on overhead lighting creates harsh shadows and makes surfaces appear dingy. Always maximise natural light by opening curtains and blinds, and supplement with additional lighting if necessary.
Visible personal items immediately signal that the space isn't prepared for guests. Remove family photos, personal appliances, medication, cleaning products, and any items that suggest current occupancy. The kitchen should feel fresh and ready for new arrivals.
Inconsistent styling between photos creates confusion about the property's actual appearance. If your first kitchen photo shows a minimalist aesthetic, don't follow with heavily decorated shots that suggest a completely different space. Maintain consistent styling throughout your kitchen photography session.
Ignoring appliance positioning wastes opportunities to showcase valuable amenities. Ensure dishwashers, microwaves, coffee machines, and other desirable features are clearly visible and identifiable in your photos. Guests specifically filter searches for properties with these amenities.
If you're struggling with getting the balance right across all your listing photos, our professional photo optimisation guide provides detailed strategies for creating cohesive, appealing imagery throughout your property.
How Do You Highlight Key Kitchen Amenities Effectively?
Strategic amenity highlighting ensures guests immediately recognise valuable features that differentiate your property from competitors. Each significant appliance or facility should be clearly visible and identifiable in your kitchen photography.
Coffee-making facilities deserve particular attention, as many guests prioritise morning caffeine access. If you provide a coffee machine, position it prominently with clean mugs nearby. Even a simple cafetière constitutes a 'coffee maker' on Airbnb's amenity list, so ensure it's clearly visible. Consider including coffee supplies like quality beans or pods in the shot to suggest immediate usability.
Dishwashers significantly impact booking decisions for families and longer stays. Photograph the dishwasher with its door slightly open to make the appliance obvious, or ensure the control panel is clearly visible and identifiable. Many guests specifically filter searches for properties with dishwashers.
Cooking facilities should showcase both capability and quality. Capture the full hob area showing all burners, and include a shot that reveals oven capacity if space allows multiple dishes. Display quality cookware if provided – a few attractive pans or a well-stocked utensil holder suggests guests can prepare proper meals.
Storage and workspace areas require careful documentation. Open cupboards to show available space for guest groceries, and ensure adequate worktop space is visible for meal preparation. Business travellers particularly value workspace areas where they can eat breakfast whilst checking emails.
Additional conveniences like microwaves, kettles, toasters, or washing machines should be positioned obviously in photos. These amenities often determine booking decisions for specific guest types, so clear visibility maximises your listing's appeal to relevant searches.
What Lighting Techniques Enhance Kitchen Photography?
Proper lighting transforms kitchen photography from functional documentation to appealing visual marketing. Natural light remains the gold standard, but strategic supplementation and timing create optimal conditions for compelling images.
Schedule photography during peak natural light hours, typically mid-morning when sunlight is bright but not harsh. Position yourself to use window light as your primary source whilst avoiding direct backlighting that creates silhouettes and obscures interior details.
Supplement natural light strategically to eliminate shadows and create even illumination across all surfaces. Turn on under-cabinet lighting if available, as this adds warmth and highlights worktop areas effectively. Overhead ceiling lights help brighten the space but avoid relying on them exclusively, as they can create harsh shadows.
Consider the colour temperature of your lighting sources. Warm LED bulbs (2700K-3000K) create inviting atmospheres that complement natural daylight, whilst cool fluorescent lighting can make spaces appear clinical and uninviting in photographs.
Use reflective surfaces strategically to bounce light around the room. Clean stainless steel appliances, glossy worktops, and glass cabinet doors help distribute light evenly and create brighter, more appealing images.
Avoid mixed lighting sources that create colour casts or uneven illumination. If using artificial lighting, ensure all bulbs match in colour temperature and brightness to maintain consistent lighting throughout the space.
For comprehensive lighting guidance that applies across your entire property, explore our detailed advice on photo quality considerations that can significantly impact your listing's visual appeal and booking performance.
How Should Kitchen Photos Integrate with Your Overall Listing Strategy?
Kitchen photography functions as part of your comprehensive listing optimisation strategy, working alongside pricing, descriptions, and amenity selections to create compelling guest experiences that drive bookings.
Ensure consistency between your kitchen photos and property description. If you mention 'fully equipped kitchen' or 'coffee facilities', your photos must clearly demonstrate these features. Guests expect visual evidence of described amenities, and discrepancies create disappointment and negative reviews.
Consider your target guest demographic when styling and shooting kitchen photos. Families need evidence of adequate cooking facilities and storage space, whilst business travellers value quick breakfast preparation areas and coffee-making capabilities. Tailor your visual narrative to attract your ideal guests.
Kitchen photos should support your pricing strategy by demonstrating value appropriate to your rates. Premium-priced properties require immaculate presentation and high-end amenities clearly showcased in photography. Budget-friendly listings benefit from emphasising functionality and cleanliness over luxury touches.
Coordinate kitchen photography with your overall photo sequence to create logical flow through the property. Kitchen images typically work well positioned after living area photos, suggesting natural progression through entertaining and dining spaces.
Your kitchen photos contribute to search algorithm performance by supporting amenity claims and guest satisfaction. Clear documentation of cooking facilities, storage space, and appliances helps guests book with accurate expectations, leading to better reviews and improved search ranking.
If you're looking for a comprehensive assessment of how your kitchen photos and overall listing perform against local competition, LetGrow's free listing analysis examines your photos, pricing, and optimisation opportunities with specific, actionable recommendations for improvement.
Remember that kitchen photos work most effectively as part of a broader optimisation strategy that includes compelling descriptions and competitive pricing to create listings that consistently attract bookings.
Frequently Asked Questions About Airbnb Kitchen Photography
How many kitchen photos should I include in my Airbnb listing?
Include 2-4 kitchen photos: one wide overview shot, one detail shot of cooking facilities, and additional images highlighting special amenities like dishwashers or coffee stations. Avoid overwhelming guests with excessive kitchen photography that takes space from other important rooms.
Should I show food or cooking supplies in kitchen photos?
Include minimal, tasteful food styling like fresh fruit, coffee supplies, or basic ingredients that suggest immediate usability. Avoid perishable items or elaborate food displays that can appear dated or artificial in photos.
What's the best time of day to photograph kitchens?
Mid-morning typically provides optimal natural lighting for kitchen photography. Avoid early morning when light is too warm or midday when direct sunlight creates harsh shadows. Supplement with artificial lighting as needed to ensure even illumination.
How do I make a small kitchen appear larger in photos?
Use wide-angle lenses carefully to capture maximum space without distortion. Clear all clutter from surfaces, maximise natural light, and shoot from corners to show depth. Consider including adjacent areas like dining spaces to suggest flow and additional room.
Should I open cabinet doors to show storage space?
Selectively open one or two cabinet doors to display quality dishware and available storage space. Ensure contents are well-organised and attractive. Avoid opening all cabinets, which can make the space appear cluttered and overwhelming.
What kitchen amenities matter most to Airbnb guests?
Coffee-making facilities, dishwashers, adequate cooking equipment, and sufficient storage rank as top priorities for most guests. Business travellers value quick breakfast preparation areas, whilst families prioritise full cooking capabilities and storage for groceries.
Effective kitchen photography significantly impacts your Airbnb listing's performance by showcasing functionality and creating guest confidence in your property's amenities. Strategic staging, proper lighting, and thoughtful composition transform ordinary kitchen spaces into compelling booking motivators that support higher occupancy rates and guest satisfaction scores. Ready to see how your listing measures up? Get your free score at LetGrow.